Monday, January 25, 2021

My Thai Coconut Curry

There are some dishes that are requested and made so often that they become a family staple.  This is one of them. 

It's really fast and easy to make and you can put just about anything into it so you can change it up every time you make it.  It's a great way to use up left overs.  This recipe easily adapts to a vegetarian or even vegan dish with a few substitutions.

There are a few essential items that are a little different if you've never tried Thai cooking before but they are easily found.  You can leave off the fish sauce if you really dislike the smell but it does make a difference in the flavour authenticity and roundedness.  Don't worry, it really doesn't taste fishy.

Red Curry paste is found in little plastic jars on the shelf as well.  Ginger can also be found in jars or you can buy a piece of ginger fresh and grate it.  Coconut milk not coconut water is used.

So easy, so good.  Thai food at home.


My Thai Coconut Curry

1 tbsp vegetable oil
1 onion, chopped
1 celery, chopped
½ green or red bell pepper
1 tsp garlic, minced
1 tsp grated ginger (bottled or grated)
2 Tbsp tomato paste
1 Tbsp Red Curry Paste (if your spice level is low cut down to 2 tsp)
2 Tbsp brown sugar
1 Tbsp fish sauce
1 - 14 oz can Coconut milk
1 c. chicken or vegetable broth

Suggested Add Ins, Up to 4 cups
-mushrooms
-zucchini
-green beans
-carrots
-broccoli
-butternut squash (I've added mashed and those squash haters won't know)
-cooked chicken or pork, chopped
-tofu
-shrimp (add just before serving when sauce is ready.  Cook until they turn pink)

Garnish
-chopped fresh cilantro
-chopped roasted peanuts
-bean sprouts
-sliced lime

  1. In a medium saucepan, add vegetable oil over medium heat.  Add onion, celery, peppers, garlic and grated ginger.  Saute for a couple of minutes.  Add the rest of the ingredient including your add ins.  Stir and bring to boil and turn down to a simmer.  Continue cooking until veggies are cooked through, about 20 to 30 minutes.  
  2. Serve over rice, or rice noodles.
  3. Garnish with lime slices, etc. as desired.

Tuesday, January 5, 2021

Easy Vegan Chocolate Pudding

With the New Year, we often try to start off with a plan for a healthy lifestyle.  The gym is out of the question thanks to lockdown and this time of the year makes exercising outside difficult to do.  This year seem to be the year for healthier eating.

When my son tried to eat vegan and gluten free for several months, trying to find a decent dessert was almost impossible.  I tried many and although my son was kind in his criticism, they were not great.  I did finally find one that worked out from America's Test Kitchen cookbook.  Not only that, my husband who was VERY skeptical, claimed he "liked it more than my regular chocolate pudding recipe"!  

I honestly never thought I'd include a Vegan dessert in my blog but here we are.  The secret to this pudding.... Avocados!  They make the pudding silky smooth and still let the chocolate shine.  And they are so much better for you than heavy cream and an added bonus, this is also gluten free.

You can still eat a great dessert on a vegan diet or take this when we get out of lockdown for a great shared dessert.


Easy Vegan Chocolate Pudding
                                                                   serves 6

1 cup water
¾ cup white sugar
¼ cup (¾ ounce) unsweetened cocoa powder*
2 tsp vanilla extract
1 tsp instant espresso powder (optional)**
¼ tsp table salt
2 large ripe avocados pitted (1 pound in total)***
3½ ounces of bittersweet chocolate chopped (70% cacao or higher)

  1. Combine water, sugar, cocoa, vanilla, espresso powder and salt in a small microwave safe bowl.  Whisk until mixed well. Heat until sugar and cocoa dissolve stirring every 15 seconds.  
  2. Scoop flesh into a food processor and process until very smooth, about 2 minutes, scraping down sides of bowl as needed. Add chocolate mixture slowly while processor is running.  Scrap down sides.  After 2 minutes, the mixture should be very smooth and glossy.
  3. Microwave chocolate in small bowl checking first after 30 seconds then every 15 seconds, stirring after each time until melted. Add to processor and mix until incorporated scraping down sides as needed.
  4. Transfer pudding to a bowl, cover with plastic wrap and refrigerate for a least 2 hours or up to 2 days.


*I prefer Dutch Process Cocoa.  It's makes a darker chocolate pudding.
**You can probably substitute espresso or regular coffee for the water if you don't      have espresso powder.  When I have tried this, I will update my blog.
***I found I needed 4 to 6 smaller avocados but it depends on the size. Weigh without the pits.


Sunday, December 27, 2020

Lemon Cranberry Pumpkin Coffee Cake

 This cake is a beautiful holiday recipe.  I often use this recipe out when faced with leftover squash.  I've tried several recipes of this type over the years and have found this one seems to be the favourite of family and guests alike.

It may seem like a long ingredient list but it comes together into a light flavourful spiced cake that is worth pursuing.

The topping/filling  is a little finicky but you can easily reduce it to half the amount and only sprinkle on top or omit it completely.  Either way, try this one.  It's really good.


Lemon Cranberry Pumpkin Coffee Cake

½ c butter softened (take out night before)
1 c white sugar
2 c all purpose flour
1 tsp baking powder
1 tsp baking soda
½  tsp salt
2 large eggs
1 tsp vanilla
1 Tablespoon lemon juice
¾ c plain yogurt
¾ c unsweetened canned pumpkin or unseasoned squash mashed
1 tsp grated lemon zest
¾ c dried cranberries

Topping:
½ c brown sugar
½ c slivered almonds or chopped walnuts 
2 tsp cinnamon
1 tsp ground allspice

  1. Cream butter and sugar in a large mixing bowl until very light in colour.
  2. In a separate medium sized bowl, whisk flour, baking powder, baking soda and salt together.
  3. In another medium bowl, mix yogurt, pumpkin and lemon zest together.
  4. In a small bowl, combines topping ingredients and mix well.  Set aside.
  5. In the butter and sugar mixture add eggs, vanilla and lemon juice.  Mix well until batter is light and fluffy. At least a couple of minutes.
  6. Add half the flour and slowly mix until incorporated.  Add yogurt pumpkin mixture and mix until well combined.  Add rest of flour and cranberries mix until combined.
  7. Spray 9 x 5 loaf pan with vegetable spray*.  Fill pan half way up with the batter.  Sprinkle half the topping over the batter.  Cover with the rest of the batter followed by the remaining topping.
  8. Bake for 55 to 60 minutes in a 350℉ oven or until skewer comes out clean. Rotate the pan back to front around halfway mark.
  9. Let cake rest for 10 minutes on a rack before turning out and letting cool.
* I used 3 mini 6 x 3 inch loaf pans which takes about 45 to 50 minutes.


Monday, November 30, 2020

Molasses Ginger Cookies

Ginger cookies are one of those cookies you either love or would prefer to pass.  I was never a fan of ginger but time passes and then suddenly I can't get enough of these cookies.  These use three kinds of ginger for those who really love ginger.  It's still subtle and not too overpowering and the molasses rounds out the overall flavour.  These are another crunchewy cookie.  My fav.

These are a great cookie to make for the Christmas season!  Just roll the ball in green or red coloured sanding sugar instead.  (Actually, I tried green and the cookies look so much nicer in white).

A tip for those that don't use fresh ginger often, you can throw that sucker in the freezer in a zip lock bag for the next time.  Just grate from frozen.  I've had a piece in the freezer for a year (I keep forgetting it's there as I use fresh a lot).


Molasses Ginger Cookies
                                               Makes about 48 - 2½ inch cookies

2¼ c. all purpose flour
1½ tsp ground ginger
1 tsp baking soda
½ tsp table salt
1 c. butter, room temperature
1¼ c. granulated sugar
1 large egg
2 Tablespoon finely chopped crystallized ginger (it's worth finding but can be
                                                                                                   omitted)                   
1 tsp finely grated peeled fresh ginger*
⅓ c. fancy molasses
1 c. sanding sugar or coarse sugar** (can use regular granulated sugar, it just won't be as sparkly)

  1. In a medium bowl whisk together flour, ground ginger, baking soda, and salt.
  2. In a stand mixer, beat butter and sugar until mixture is pale and fluffy.  This will take about 2 minutes.  Don't worry you can go longer if you're not sure.  It should visibly look paler than when you started and fluff up in quantity.
  3. Beat in egg, crystallized and fresh ginger and molasses.
  4. Add flour and mix on low until well combined with no white streaks.  (Don't worry if there are.  I've baked them this way and they still taste great.)
  5. Cover and refrigerate for about an hour.***
  6. Using a Tablespoon or Tablespoon cookie scoop, scoop and roll into balls.  Roll in sanding sugar.  Place on parchment covered cookie sheet about 3 inches apart.  These do spread a fair amount.****
  7. Bake at 350℉, rotating pans halfway through, until cookies flatten and have dark golden brown edges. This is will take 12 to 14 minutes.
  8. Let cool 5 minutes on the pan and then transfer to wire rack to cool completely.

*If you use the fresh ginger from a jar, I found that there were long strands of fibre that need a quick mince before adding to the mixture.  I also found that the cookies weren't nearly as gingery but still a great alternative.  

**If you use coarse sugar, it will be larger crystals so lightly coat the balls

***It needs to firm up enough to scoop out.  I left it overnight but found it needed about an hour or 2 at room temperature to be able to scoop out .

****If they spread and make one large cookie don't worry.  Use a spatula or knife and score them while they are still warm.  Take them apart before they cool completely.

Monday, November 2, 2020

Cinnamon Spiced Green Tomato Cake

If you had a garden this year and grew tomatoes, you probably have some green tomatoes that never ripened.  While some of these tomatoes may still mature, inevitably there will be some that won't.

This cake is a wonderful way to make use of a fair number.  It is a beautifully light, moist cake with a lovely cinnamon spice.  Once it's tried, it always changes the minds of those dubious to try.  Best of all, it's a fairly healthy cake with all that fruit.  The diced tomatoes end up being similar to pieces of candied peel!  Great for breakfast, a snack or tea.


Cinnamon Spiced Green Tomato Cake 

4 cups finely diced green tomato (the smaller the better)
1 Tbsp table salt
½ cup butter (softened)
1¾ cup sugar
2 large eggs
2 c. all purpose flour
1 tsp cinnamon
½ tsp nutmeg
1 tsp baking soda
¼ tsp salt
½ c. raisins
½ c. chopped walnuts
  1. Place diced tomatoes in a bowl and sprinkle with 1 Tbsp of salt.  Stir.  Let stand 30 minutes.  Rinse and drain in a sieve.  Try to remove as much water as you can.
  2. Grease 9 x 13 inch pan.
  3. Cream butter and sugar in mixer.  Add eggs and beat until smooth.
  4. In another bowl, stir flour, cinnamon, nutmeg, baking soda and salt.  Add to butter and sugar mixture with raisins and walnuts.  Mix through.
  5. Bake in 350℉ oven for 30 to 40 minutes or until a toothpick comes out clean.

Friday, October 30, 2020

Crisp Cheddar Crackers

 Here is another recipe I hadn't thought about sharing until I served them as a last minute appetizer for a friend.  I just pulled them from the freezer and quickly tossed them into the oven to warm up.  Perfect with the wine we were sharing.

"You should put these on your blog!  I love them.  I want the recipe.  I can't stop eating them."

Here you go Judy.  These are wonderfully crisp and light.  Fast to put together and bake.  Best of all, you can make them ahead and leave them in the fridge for a week or freeze them for a few months.  Let them come to room temperature to serve or crisp them in the oven for a few minutes.  Umm that smell!


Crisp Cheddar Crackers
                                            Makes about 3 dozen
1 cup all purpose flour
½ cup butter (softened)
1½ cup grated old cheddar cheese, packed or 6 ounces weighed*
1 cup Rice Krispies cereal
⅛ to ¼ tsp cayenne 
1 egg, beaten
  1. Cut butter into the flour until it looks like coarse meal or when the butter is more or less throughout.  Carefully stir in cheese, Rice Krispies and cayenne.**  Add beaten egg and mix tossing gently until coated throughout.
  2. Take about a tablespoon of the mixture and form it into a small 1 inch ball and flatten.***  Place on an ungreased baking sheet about 2 inches apart.  You will need 2 or 3 baking sheets.
  3. Bake cookies in a 350℉ convection oven for 11 minutes or longer for regular oven (about 15 minutes) or until edges are a light brown, rotating the pans half way through.
  4. Remove the cookies to a rack and let cool.  If they are not as crisp as you'd like after cooling, you can put them back into the oven to crisp up before serving later on.

*Old or extra old is the best bet here.  Not mild or medium.   
** I use my hands and gently turn the mixture or fluff from the bottom of the bowl         a few times.
*** Try not to pack it too hard or work it too much or they will be tough

Wednesday, October 14, 2020

Mocha Chocolate Layer Cake


I know I've already included a chocolate cake recipe but this is an all around amazing and easy basic chocolate cake and who doesn't want more chocolate cake!  You don't need a mixer, only a bowl and a whisk (It is easier to make the frosting with a mixer however).  This is the one recipe that is always used when I'm making a birthday cake or cupcakes. It is based on an Ina Garten cake recipe (with slight changes) that has been a favourite for many bakers and is always rated 5 star.  It's so moist and light and wonderfully chocolaty and better yet, you can make it up to 2 days ahead.  

If you aren't a big coffee person, you can just use hot water but coffee really brings out the beautiful chocolate flavour without really tasting the coffee.  Honest!  


Cake is baked using a 6 inch pan with Swiss Meringue Buttercream (recipe not on this blog). Decorated by my daughter.


 Mocha Chocolate Layer Cake

                                                      Makes 2 layer 8 inch cake or 2 dozen cupcakes
Cake
1¾ c. all purpose flour
2 c. white sugar
¾ c. unsweetened cocoa powder (either regular or Dutch process)
2 tsp baking soda
1 tsp baking powder
½ tsp table salt
1 c. buttermilk*
½ c. vegetable oil
2 large eggs
1 tsp vanilla
1 c. hot coffee

Frosting
6 oz. semisweet or bittersweet chocolate, coarsely chopped
1 c. butter at room temperature
1 large egg yolk
1 tsp vanilla extract
1 c. icing sugar
1 Tbsp instant coffee granules or 1 tsp espresso powder (can be omitted)

  1. Cake:  Spray two 8 inch round cake pans well with vegetable spray and line with parchment paper.** 
  2. In a large bowl, whisk flour, sugar, cocoa powder, baking powder, baking soda and salt.  In another medium bowl, whisk the buttermilk, vegetable oil, eggs and vanilla.  Slowly whisk the wet mixture into the dry mixture until just mixed through.  Then add the hot coffee and whisk until well blended and no dry spots.
  3. Pour the batter into the prepared pans and bake for 30 to 35 minutes in a 350℉ oven.*** Or until a toothpick inserted into the centre of the cake comes out clean.  Let cool for 20 minutes and then invert onto cake rack.  Peel off parchment.
  4. Frosting:  In a microwave safe bowl, heat chocolate for 30 seconds and stir.  Keep doing 30 seconds and stir until melted.  
  5. In a bowl beat the butter, egg yolk, vanilla and icing sugar with mixer until well combined.  In small bowl, combine instant coffee with 1 Tbsp hot water.  Add this and the cooled chocolate mixture to the butter mixture and blend until uniform.
  6. For Icing:  Frost as desired using about ¼ to ⅓ of a cup for the middle of the cake and the rest for the top and sides.****  I sometimes like to put raspberry jam in the centre instead.  Refrigerate about an hour or up to 2 days before serving.

* or you can use ½ c. plain yogurt and ½ c. milk
** or you can place cupcake liners into 24 muffin tins
*** cupcakes will take about 20 minutes
**** for a birthday cake, I place one cake rounded side down (upside down) on the bottom and then put the frosting on and then place the other cake layer rounded side up. Finish frosting and decorate as desired.  However, for the unicorn cake, a flat top was required so either trim the dome or flip and put the flat top up.

Monday, September 28, 2020

Chocolate, Peanut Butter and Fudge Pie


This is such a great dessert to make.  It's very easy to put together, uses simple every day ingredients and can be made ahead of time.  A day or 2 ahead even!  This fudgy dream is a favourite of all ages and can look incredibly fancy if you want it to.  You don't even need to turn on the oven.  To make it one step easier, just buy the crust from the grocery store and no one will know. 


*My pie is made with gluten free crust (for a gluten sensitive person) with cornflakes and cocoa powder. 


  Chocolate, Peanut Butter and Fudge Pie


Chocolate Crumb Crust:
1½ c. Chocolate Oreo crumbs or graham wafers 
⅓ c. melted butter

Chocolate Fudge Filling:
4 ounces bittersweet or semisweet chocolate, chopped
½ c. heavy cream
1 tablespoon corn syrup

Peanut Butter Filling:
1 c. peanut butter smooth or crunchy
½ c. icing sugar
½ c. heavy cream
1 tsp vanilla

  1. For the crust:  Toss Oreo crumbs or graham wafers together with melted butter.  Press into a 9 inch pie plate.  Refrigerate 30 minutes or freeze 10 minutes until fairly firm.
  2. Fudge Filling:  Place all ingredients into a small bowl.  Microwave for 30 seconds.  Stir.  Continue microwaving in 10 second intervals and stir until melted and smooth.  Pour a small amount into a small sandwich bag (about ⅛ of a cup).  Set aside.  Pour the rest of the fudge filling onto the chilled crust.  Tilt pie plate to cover the bottom evenly.  Place back in freezer for 10 minutes.
  3. Peanut Butter Filling:  Place all ingredients into a mixer.  Beat until smooth.  Spread evenly on fudge filling.  
  4. Take the fudge filling that was set aside in the sandwich bag.  Snip a small hole (about and ⅛ of an inch) in one corner.  Spiral the chocolate around the pie.  To make the chevrons, run a knife from one side to the other alternating directions.*
  5. Refrigerate till well chilled.  At least 2 hours and up to 2 days ahead.
*Worried the pattern doesn't look nice?  Just shave some chocolate over top.  Voila, easy as pie.

Thursday, September 10, 2020

Chocolate Espresso Crunch Bars


It finally cooled down enough that I was able to retest a cookie recipe before I committed to a post.  It is a family favourite (I know, all of them seem to be family favourites but to be fair; I have many family members with different favourites).  This will be yours too if you love coffee, toffee and chocolate in a crunchewy bar.  Bake it a little longer if you prefer a crisper cookie or shorter for a softer chew.


 Chocolate Espresso Crunch Bars

2 c. all purpose flour
½ tsp. baking powder
¼ tsp. salt
1 c. butter, room temperature
1¼ c. packed brown sugar
2 Tbsp. instant espresso powder
½ tsp. vanilla
1 c. bittersweet chocolate chopped or semisweet chocolate chips

  1. Whisk flour, baking powder and salt together in a bowl.
  2. Beat butter and sugar in mixer till well blended and uniform.  Add espresso powder and vanilla.  Mix.  
  3. Slowly add flour mixture until just mixed.  Stir in chocolate.  This dough will be fairly thick.
  4. On an ungreased rimmed baking sheet (I use 10½ x 15½ size) press dough to corners as evenly as possible.*
  5. Bake in 325℉ oven for 18 to 24 minutes or until lightly browned and edges begin to crisp.  Turn sheet pan after 10 minutes for more even baking.
  6. Let cool or 1 or 2 minutes.  Cut into bars while still warm and then transfer to rack.  Let cool. They will crisp as they cool.
*If you use a larger pan, shape into a square about the right size.  11 x 15 square will take about the same time.  Longer time for crispier bars. 

Sunday, August 30, 2020

Roasted Tomatillo Salsa


I have a garden in the summer and grow a number of herbs and vegetables.  Tomatillos are one the unusual items and I so look forward to making salsa with them when they are ripe.

This recipe makes a wonderful tangy, spicy yet fresh Mexican style green salsa. It's easy to make and goes well with just about anything.

I've paired it with fish, burgers, falafels, eggs, pork chops and of course taco and fajitas.

Tomatillos are worth seeking out now that they are in season.


 Roasted Tomatillo Salsa

1½ lbs. fresh tomatillos (papery skins removed and rinsed)
3 or 4 fresh jalapeƱos for spicy or (1 or 2 for mild)
3 garlic cloves unpeeled
½ c. fresh cilantro (stems and leaves)
1 large onion, chopped
2 tsp. coarse salt or 1 tsp table salt
  1. Place tomatillos, jalapenos, and garlic cloves on a foil lined baking sheet.
  2. Place under a broiler 2 inches from heat source.  Broil until soft and slightly charred.  About 7 to 9 minutes.*
  3. Remove skin from garlic.  
  4. Add all to food processor including cilantro, onion and salt.
  5. Process till slightly chunky.
  6. Enjoy!

* Alternately you can grill everything on the barbecue.

Sunday, August 16, 2020

Sweet Marie Bars

This wonderfully easy but delicious cookie bar recipe is a favourite for kids and adults alike.  Chocolate, peanut butter, nuts with that crunch of popped rice is a family favourite reminiscent of that no longer available but classic Canadian chocolate bar.  It's fast and easy and no bake.  Perfect for these hot days of summer when you want dessert but don't want the oven on. 

Go on give them a try.  Bask in the compliments.


Sweet Marie Bars

½ c. Peanut butter (regular or crunchy)
½ c. corn syrup
1¼ c. brown sugar
1 Tbsp. butter
3 c. Rice Krispies
½ c. chopped nuts
1½ c. semi sweet or bittersweet chocolate

  1. In a large microwave safe bowl, melt the peanut butter, corn syrup and brown sugar.  Mix 'til smooth.  Add Rice Krispies, butter and chopped nuts.  Mix well.
  2. Lightly press mixture into the bottom of a lightly greased 9" x 12" pan.
  3. Melt the chocolate in a bowl in the microwave starting for 1 minute then in 20 second increments.  Stir well after each session.  Spread over top of bar.
  4. Refrigerate until firm.
  5. Cut into bars and enjoy.

Sunday, July 26, 2020

Creamy No Churn Ice Cream

Yes, ice cream!  Everybody's favourite summertime dessert that can be made without an expensive, spacing taking ice cream maker.  The best part is you can make it any flavour you like.  The down side.. You do have to wait 4 to 5 hours to have it.  But think of the possibilities.....I tried chocolate with raspberry jam swirl, macha tea flavour, and our favourite cherry ribbon.

There's very few ingredients and actual prep time is minimal.  So get out your mixer and give it a try.


Cherry Ripple


Chocolate & Raspberry Jam Swirl


Creamy No Churn Ice Cream

1 can of sweetened condensed milk or 300 ml
2 tsp vanilla extract
¼ c whole milk (or 2%)
¼ c corn syrup
2 Tablespoons sugar
pinch of kosher or sea salt
2¼ cups heavy cream, cold
16 oz mashed frozen but slightly thawed cherries (so it's not one block)*

  1. In a medium bowl, whisk sweetened condensed milk, vanilla, milk, corn syrup, sugar and salt together till combined.  Set aside.
  2. In a large bowl, whip heavy cream until stiff peaks.  (When you lift the beater the cream peaks stay up and don't droop).
  3. Fold about 1 cup of the whipped cream into the condensed milk mixture till combined.  Then add this bowl into the whipped cream bowl and fold gently till even throughout.  Don't beat.  You're trying to keep the softness to keep the ice cream from being too hard.
  4. Fold in half of the cherries.
  5. Pour into a 9 x 5 x 3 inch loaf pan or 8 or 9 inch square pan or anything that hold about 8 cups.  (I use a pyrex glass dish because serving looks much nicer).  Gently place the rest of the cherries across top. If it is too soft you may have to let partially freeze (~30 min.) or everything will end up on the bottom of the dish.
  6. Place a piece of plastic wrap over the entire surface.
  7. Freeze for at least 5 to 6 hours.
  8. To serve, remove from the freezer about 20 to 30 minutes before to soften.
* If making chocolate raspberry swirl.  Decrease vanilla to 1 tsp. Omit cherries and add 6 oz of melted chocolate (either mix fully or swirl with ¼ cup of raspberry or strawberry jam)

Additional ideas:
Dark chocolate - Decrease vanilla to 1 tsp. and add 6 oz melted bittersweet chocolate and ½ tsp espresso powder

Peanut Butter Cup - Omit vanilla and add ½ c. peanut butter to condensed milk portion.  Gently stir in ½ c. chopped roasted peanuts.

Caramel Pecan - Swirl in ¼ c. caramel sauce and ½ c. chopped toasted pecans

Or Skor bits or mini rollos......

Be creative and enjoy your masterpiece.  It'll be delicious anyway you make it.

Monday, July 13, 2020

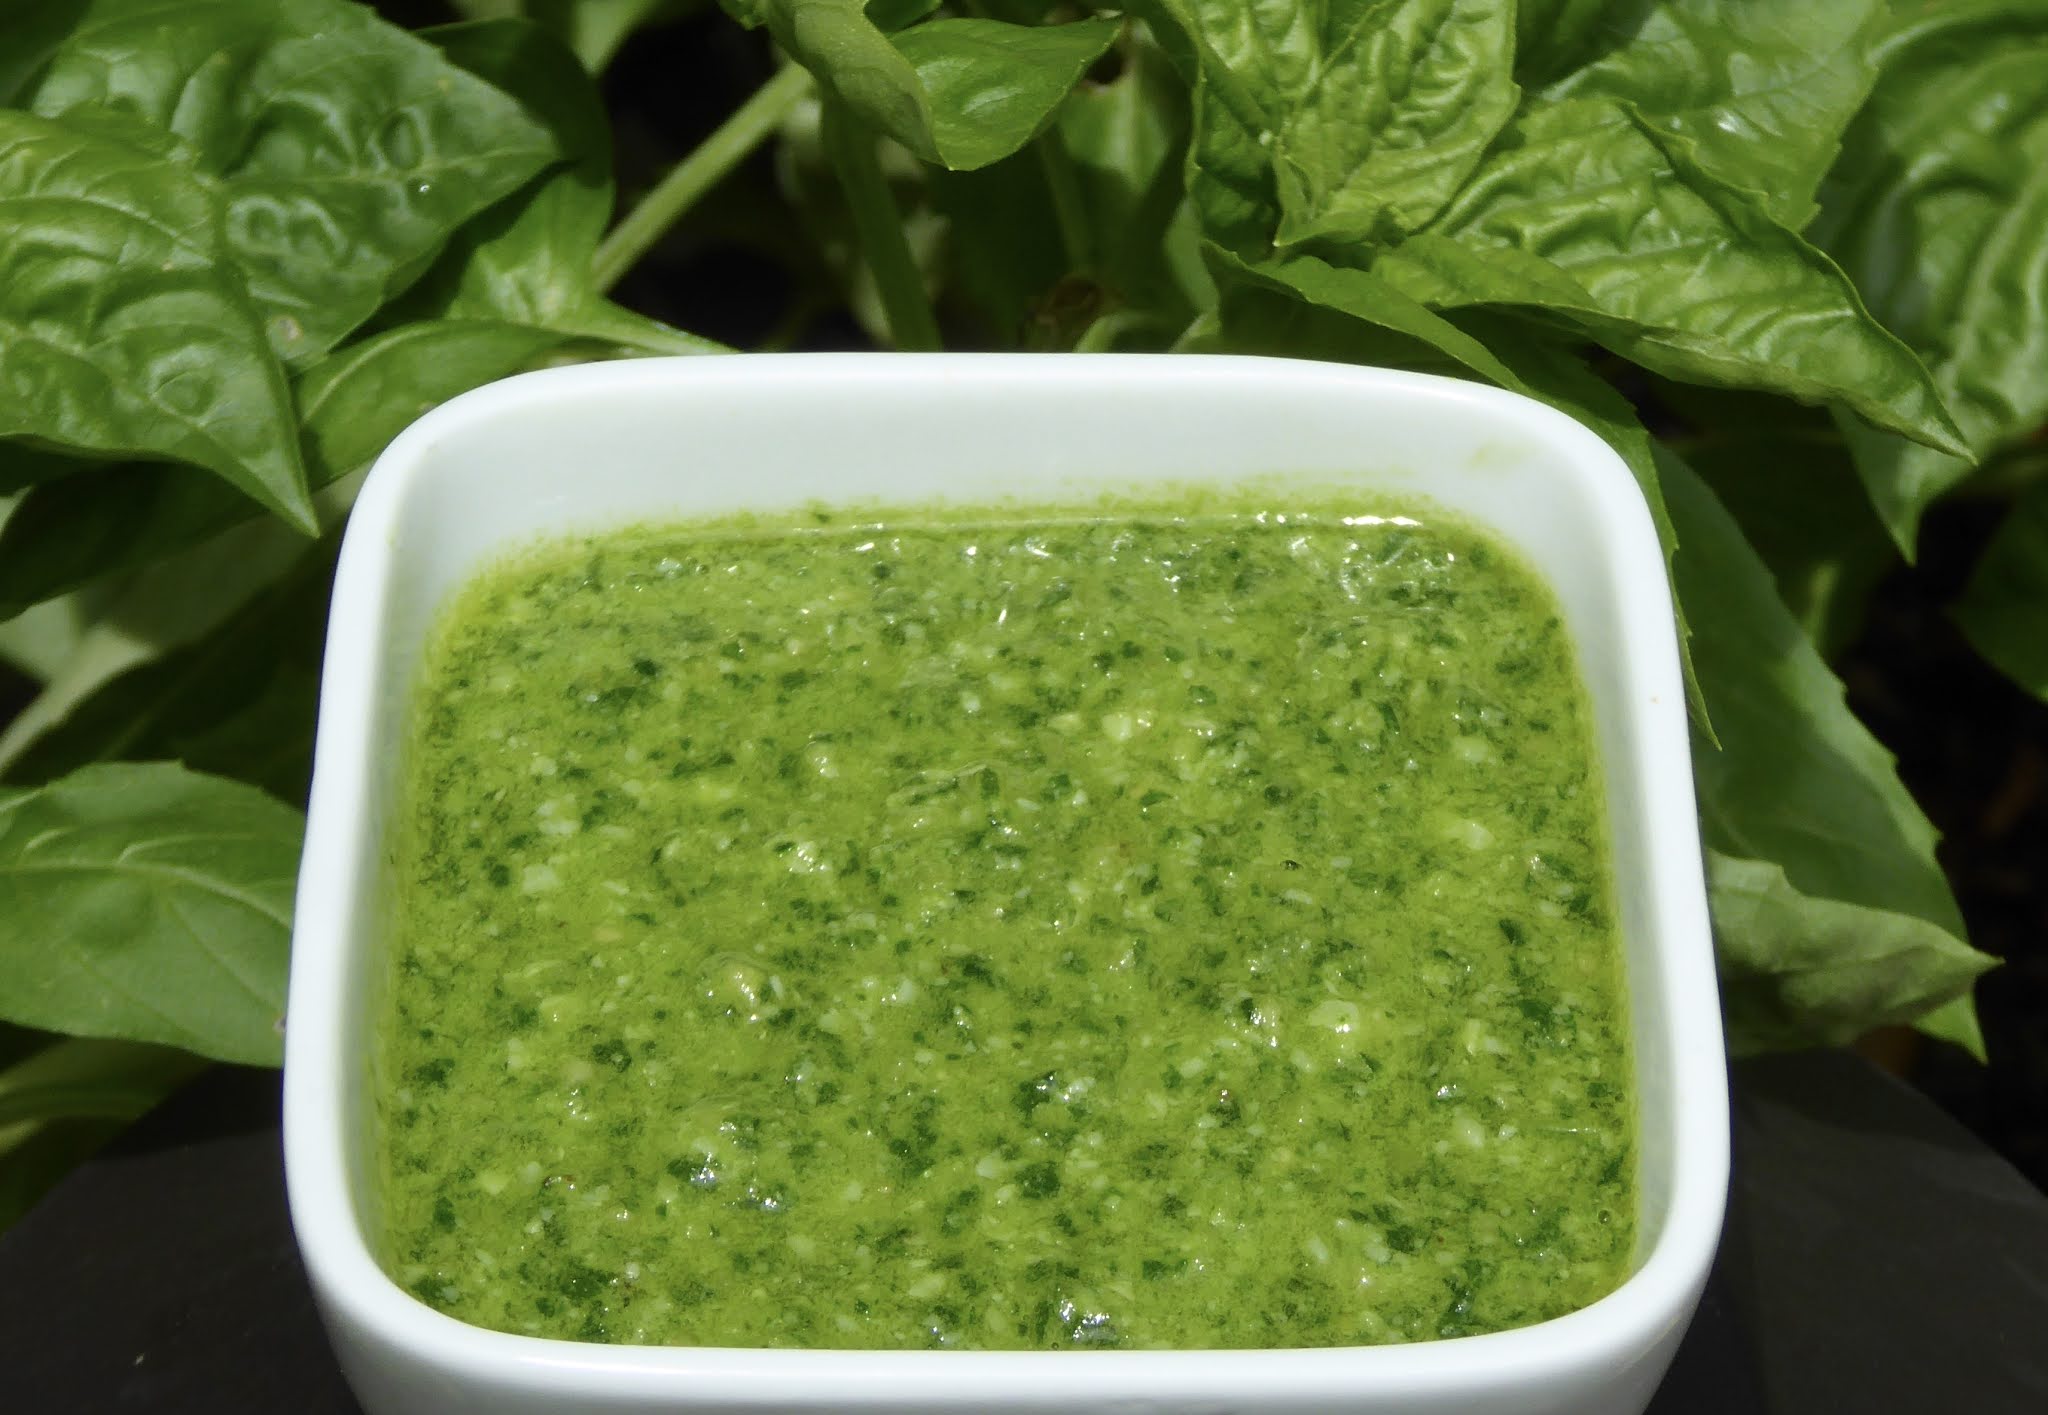
Easy Pesto

Summer is here which means fresh basil, one my favourite herbs to grow is ready to harvest.  Lovely to add to a salad or torn and sprinkled on Caprese Salad but my favourite thing to do with basil is make pesto.

It's fast and easy and all you need to do is throw all the ingredients into a food processor and 'voila' done.

Serve it on pasta, drizzled over garden fresh tomatoes, add it to mayo to make a sandwich spread, add a dollop to a salad dressing, as a dip with pizza..., so many uses. 

Oh, and if you don't have enough basil.  No problem.  Top up with fresh parsley.  Don't have that, try fresh spinach or arugula.  Of course the flavour will be different but it'll still be great.  

FYI.  Growing basil is really easy.  Buy those little containers of starter basil at your local nursery.  Plant them in at least a 5 litre container using Miracle-Gro potting mixture.  (It really makes a difference).  Place them in full sun and water them well when needed.  In a couple of months, you'll have the biggest basil plant ever.


Easy Pesto

3 c. packed fresh basil leaves
4 cloves garlic, roughly chopped
⅔ c. grated parmesan cheese
½ c. pine nuts
½ tsp. table salt
½ c. extra virgin olive oil
  1. In a food processor add all ingredients except olive oil.  Process till large leaves broken down.  Add olive oil and process till smooth.  30 sec.
  2. Use or refrigerate.  You can it in containers (I use those small plastic containers that pizza dip sauces come in when getting take out) or ice cube trays (pop them out after and place in bag).